top of page
 Merry Me, by Hansol Jung at Diversionary Theatrephoto by Talon Reed Cooper |  Merry Me, by Hansol Jung at Diversionary Theatrephoto by Talon Reed Cooper |  Merry Me, by Hansol Jung at Diversionary Theatrephoto by Talon Reed Cooper |
|---|---|---|
 Merry Me, by Hansol Jung at Diversionary Theatrephoto by Talon Reed Cooper |  Hamlet, Illinois Shakespeare Festivalphoto by Pete Guither | 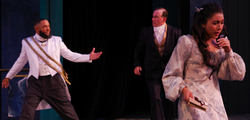 Hamlet, Illinois Shakespeare Festivalphoto by Pete Guither |
 Hamlet, Illinois Shakespeare Festivalphoto by Pete Guither |  Hamlet, Illinois Shakespeare Festivalphoto by Pete Guither | 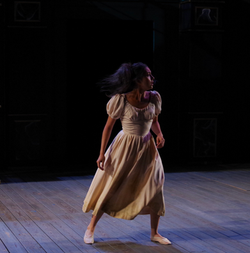 Hamlet, Illinois Shakespeare Festivalphoto by Pete Guither |
 Hamlet, Illinois Shakespeare Festivalphoto by Pete Guither |  The Roommate, by Jen SilvermanCenter REP | 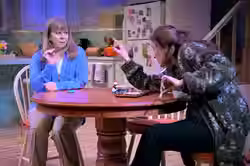 The Roommate, by Jen SilvermanCenter REP |
 Constellations, by Nick Payne, at American Players TheatrePhotos by Liz Lauren Voice & Text Coach: Eva Breneman Costume Design: Izumi Inaba Scenic Design: Scott Penner Lighting Design: Keith Parham Sound Design & Original Music: Jeffrey Levin Director of Artistic Sign Language: Joshua Castille Stage Management Assistant: Emily Pfaff Stage Manager: Lina Benich |  Constellations, by Nick Payne, at American Players TheatrePhotos by Liz Lauren Voice & Text Coach: Eva Breneman Costume Design: Izumi Inaba Scenic Design: Scott Penner Lighting Design: Keith Parham Sound Design & Original Music: Jeffrey Levin Director of Artistic Sign Language: Joshua Castille Stage Management Assistant: Emily Pfaff Stage Manager: Lina Benich |  Constellations, by Nick Payne, at American Players TheatrePhotos by Liz Lauren Voice & Text Coach: Eva Breneman Costume Design: Izumi Inaba Scenic Design: Scott Penner Lighting Design: Keith Parham Sound Design & Original Music: Jeffrey Levin Director of Artistic Sign Language: Joshua Castille Stage Management Assistant: Emily Pfaff Stage Manager: Lina Benich |
 The Lehman Trilogy, by Stefano Massinico-directed by Nick Bowling & Vanessa Stalling Chicago Premiere at Broadway in Chicago's Broadway Playhouse Photo by Liz Lauren |  The Lehman Trilogy, by Stefano Massinico-directed by Nick Bowling & Vanessa Stalling Chicago Premiere at Broadway in Chicago's Broadway Playhouse Photo by Liz Lauren |  The Lehman Trilogy, by Stefano Massinico-directed by Nick Bowling & Vanessa Stalling Chicago Premiere at Broadway in Chicago's Broadway Playhouse Photo by Liz Lauren |
 Fen, by Caryl ChurchillThe Court Theatre |  Fen, by Caryl ChurchillThe Court Theatre |  Fen, by Caryl ChurchillThe Court Theatre |
 The Great Leap, Lauren YeeAsolo Repertory Theatre |  The Great Leap, by Lauren YeeAsolo Repertory Theatre |  The Great Leap, Lauren YeeAsolo Repertory Theatre |
 Titanic (Scenes from the British Wreck Commissioner's Inquiry, 1912), by Owen McCaffertyThe Court Theatre |  Titanic (Scenes from the British Wreck Commissioner's Inquiry, 1912), by Owen McCaffertyThe Court Theatre |  Titanic (Scenes from the British Wreck Commissioner's Inquiry, 1912), by Owen McCaffertyThe Court Theatre |
 Roe, by Lisa LoomerThe Goodman Theatre | 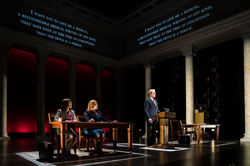 Roe, by Lisa LoomerThe Goodman Theatre | 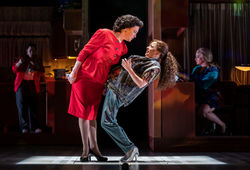 Roe, by Lisa LoomerThe Goodman Theatre |
 Photograph 51, by Anna ZieglerThe Court Theatre |  Photograph 51, by Anna ZieglerThe Court Theatre |  The Wolves, by Sarah DeLappeThe Goodman Theatre |
 The Wolves, by Sarah DeLappeThe Goodman Theatre |  The Wolves, by Sarah DeLappeThe Goodman Theatre | 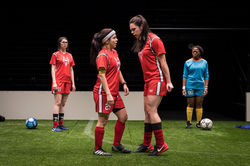 The Wolves, by Sarah DeLappeThe Goodman Theatre |
 Hookman, by Lauren YeeSteep Theatre, Photo by Lee Miller |  Hookman, by Lauren YeeSteep Theatre, Photo by Lee Miller |  Hookman, by Lauren YeeSteep Theatre, Photo by Lee Miller |
 United Flight 232Photo by Michael Brosilow |  United Flight 232Photo by Michael Brosilow | 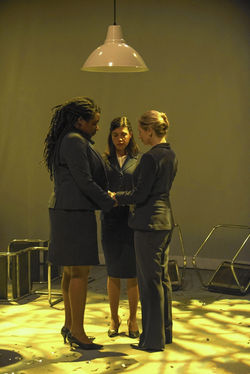 United Flight 232Photo by Michael Brosilow |
 United Flight 232Photo by Michael Brosilow |  The America Play, by Suzan-Lori Parks, at OraclePhoto by Joe Mazza Brave Lux |  The America Play, by Suzan-Lori Parks, at OraclePhoto by Joe Mazza Brave Lux |
 The America Play, by Suzan-Lori Parks, at OraclePhoto by Joe Mazza Brave Lux |  The America Play, by Suzan-Lori Parks, at OraclePhoto by Joe Mazza Brave Lux |  The America Play, by Suzan-Lori Parks, at OraclePhoto by Joe Mazza Brave Lux |
 The America Play, by Suzan-Lori Parks, at OraclePhoto by Joe Mazza Brave Lux |  The America Play, by Suzan-Lori Parks, at OraclePhoto by Joe Mazza Brave Lux |  Mutt, by Christopher ChenStage Left Theater |
 Mutt, by Christopher ChenStage Left Theater |  Mutt, by Christopher ChenStage Left Theater |  Circuscope at The Actors GymnasiumPhoto Credit: Kate Tabor and Sam Fishkin |
 Circuscope at The Actors GymnasiumPhoto Credit: Kate Tabor and Sam Fishkin |  Circuscope at The Actors GymnasiumPhoto Credit: Kate Tabor and Sam Fishkin |  Circuscope at The Actors GymnasiumPhoto Credit: Kate Tabor and Sam Fishkin |
 Mrs. Packard, by Emily MannCenter for the Performing Arts, ISU |  Mrs. Packard, by Emily MannCenter for Performing Arts, ISU |  Mrs. Packard, by Emily MannCenter for Performing Arts, ISU |
 Mrs. Packard, by Emily MannCenter for Performing Arts, ISU |  The Normal HeartBoston University |  The Normal HeartBoston University |
 The Normal HeartBoston University |  The Normal HeartBoston University |  A Midsummer Night's DreamIllinois State University's Westoff Theatre |
 A Midsummer Night's DreamIllinois State University's Westoff Theatre |  A Midsummer Night's DreamIllinois State University's Westoff Theatre |  A Midsummer Night's DreamIllinois State University's Westoff Theatre |
 Amelia2012, National High School Institute-Northwestern University Photo by Christopher Ash |  Amelia2012, National High School Institute-Northwestern University Photo by Christopher Ash |  Amelia2012, National High School Institute-Northwestern University Photo by Christopher Ash |
 Amelia2012, National High School Institute-Northwestern University Photo by Christopher Ash |  Gone Missing2012, Illinois State University |  Gone Missing2012, Illinois State University |
 Gone Missing2012, Illinois State University |  |  The Cabinet2010, Director of Remount Original Direction: Frank Maugeri |
 The Cabinet2010, Director of Remount Original Direction: Frank Maugeri |  The Cabinet2010, Director of Remount Original Direction: Frank Maugeri |  Winter Pageant 2008 |
 Winter Pageant 2009 |  Winter Pageant 2009 |  Twilight OrchardCo-Direction with Jim Lasko & Frank Maugeri Photo by Sean Williams |
 Twilight OrchardCo-Direction with Jim Lasko & Frank Maugeri Photo by Sean Williams |  Twilight OrchardCo-Direction with Jim Lasko & Frank Maugeri Photo by Sean Williams |
bottom of page